[How-To] Building Your Own Social Networking Site. Part 3 - Setting up HumHub
By : Bijay Acharya / studentvideotutorial
- Welcome to part 3 of How-To series on "Building Your Own Social Networking Site".
- In this part, I'll show you how to setup 'humhub' with an admin role.
Let's begin.
Step 1 : Login to your site that we created in part 2. By default, it will look like following screen once you login.
Step 2 : Click on 'System Administrator' on top right corner. As shown in image below.

Step 3 : Then click on 'Administration' as shown in image above. Now, following screen will appear.

Step 4 : Notice 'users' tab in above image ? Well, under this section, registered user's name and email will be shown. Now, click 'settings' tab. Then following screen will appear.

Step 5 : Now, you clearly saw settings there. From this section, we can define who can register, or new user registration needs approval or not and more. As per your policy, edit those sections.
Step 6 : Well, now click 'Profile' tab. Screen like below will appear.

Step 7 : Here, you can edit or add new field as per your requirement. Watch it, and try to edit and create new fields. Not so much complex.
Similarly, when you click on 'groups' tab, then you will get to know about created group, or you can create new group, also you can delete groups.
Notice : You liked it ? Well, now go through each and every tab/section in admin panel. There are lots of things you can do easily. Define rule, change settings, make it look cool.
Finally, this is it for HumHub. And together with this part, I've finished teaching you about using "Softaculous App installer > Social Networking Section" for creating Social Networking Site From Scratch.
Now, from next part, I'll show you how to use Wordpress Installation and WP Plugins to create more powerful and dynamic social networking platform.
Stay Tuned.
By : Bijay Acharya / studentvideotutorial
- Welcome to part 3 of How-To series on "Building Your Own Social Networking Site".
- In this part, I'll show you how to setup 'humhub' with an admin role.
Let's begin.
Step 1 : Login to your site that we created in part 2. By default, it will look like following screen once you login.
 |
| image source : humhub dashboard. |
Step 2 : Click on 'System Administrator' on top right corner. As shown in image below.

Step 3 : Then click on 'Administration' as shown in image above. Now, following screen will appear.

Step 4 : Notice 'users' tab in above image ? Well, under this section, registered user's name and email will be shown. Now, click 'settings' tab. Then following screen will appear.
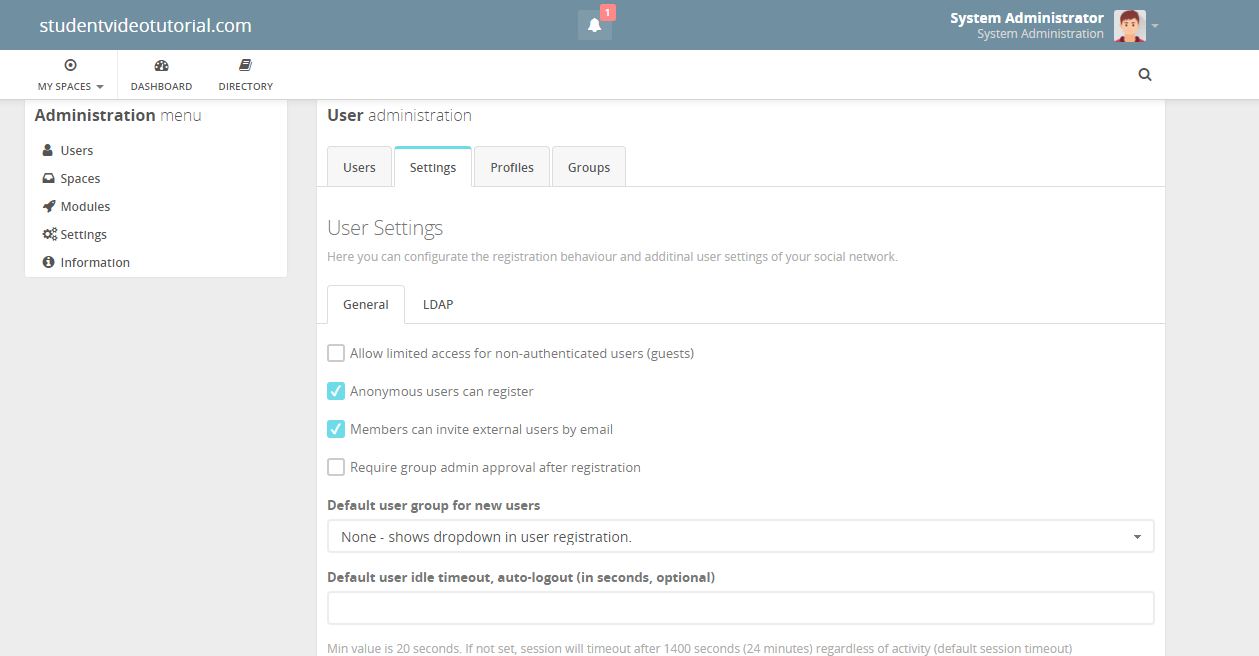
Step 5 : Now, you clearly saw settings there. From this section, we can define who can register, or new user registration needs approval or not and more. As per your policy, edit those sections.
Step 6 : Well, now click 'Profile' tab. Screen like below will appear.

Step 7 : Here, you can edit or add new field as per your requirement. Watch it, and try to edit and create new fields. Not so much complex.
Similarly, when you click on 'groups' tab, then you will get to know about created group, or you can create new group, also you can delete groups.
Notice : You liked it ? Well, now go through each and every tab/section in admin panel. There are lots of things you can do easily. Define rule, change settings, make it look cool.
Finally, this is it for HumHub. And together with this part, I've finished teaching you about using "Softaculous App installer > Social Networking Section" for creating Social Networking Site From Scratch.
Now, from next part, I'll show you how to use Wordpress Installation and WP Plugins to create more powerful and dynamic social networking platform.
Stay Tuned.
Comments
Post a Comment