By : Bijay Acharya / studentvideotutorial
What will we cover in this part?
– Calculating/Comparing MD5 Hash of files, disks and folders with the MD5 hash calculator
– Creating Cases with the Autopsy tool, built on Kali Linux OS (Autopsy is used for creating new cases and analyzing previously created cases.)
Note: You must have the Image that we created in Part 1.
Steps:
– Download the ‘MD5 Hash Calculator’ first. With the MD5 Hash Calc, we can easily right click the files/folder and calculate it’s hash. Or, even we can compare the hash.
– For AutoSpy, go to >>applications >> Kali Linux > > Forensics > > Forensics suites > > Select Autopsy (Then, follow the process.)
Using MD5 Calculator –
 |
| image ; md5 calculator screenshot |
1) After installing MD5 Calculator, right click any image, folder, file (.exe, .mp3, .mpg, .avi, etc.). Then, select MD5 Calculator.
2) You’ll then see the calculated hash for selected file.
3) Copy the hash / or, note it down in paper.
4) Go to >> c: >> program files(x86) > > Bullzip > > MD5 Calculator > > MD5.exe (open it)
5) You can compare hash calculated from framework you get after successful step 4.
Using AutoSpy –
1) After firing up autopsy in Kali Linux, notice that it asks us to open up a browser at http://localhost:9999/autopsy
 |
| image : autopsy from terminal of kali linux. |
2) Copy the URL and paste it into the default browser in Kali Linux. (In the video, I used Iceweasel)
3) On success, you’ll get the screen for Autopsy. Select NEW CASE from available options.
 |
| image : from autopsy in kali terminal. |
4) In the next step, provide CASE name and Investigators name. Click NEW CASE again in bottom
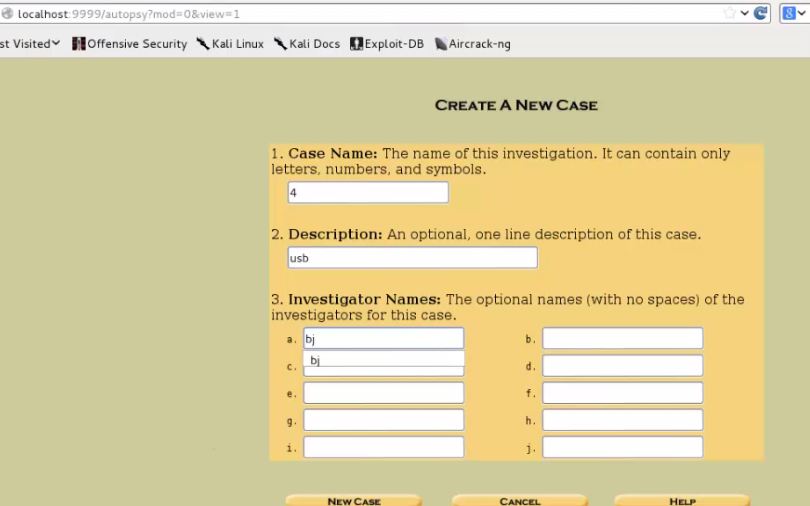 |
| image : from autopsy in kali terminal. |
5) You will get CASE directory and config file location. Take note of it and Click add host. The host will be for the Disk Image we created earlier in Part 1.
6) Now, create the host name and click add host.
7) We must add the IMAGE that we created to the host we created in step 6.
 |
| image : from autopsy in kali terminal. |
8) Give the location of IMAGE to Autopsy. In my case (/media/BJ/1.ad1)
 |
| image : from autopsy in kali terminal. |
9) Select the Disk Type and Import Method and click next.
10) You can now calculate the hash for added the image/created case or you can provide the new hash to image added to case.
Thanks for reading!
Comments
Post a Comment